Saturday, July 21, 2018
Landing at Sulphur Creek Ranch in the Idaho Backcountry
Landing at Sulphur Creek Ranch with Backcountry Instructor Jim Hudson in a modified 1965 Cessna 182. Some of the modifications include larger tires, airglas nose fork, and a Stene Aviation Sportsman STOL kit.
Saturday, July 14, 2018
Landing at Mahoney Creek Airstrip - Middlefork of the Salmon - Idaho Backcountry
I have been doing some flight training with my backcountry instructor Jim Hudson. I completed my Backcountry Level 2 Checkout this week. I will be posting some videos of some of that training over the next few weeks.
This is a video of landing at Mahoney Creek airstrip on the Middlefork of the Salmon. This is one of the more difficult runways due to the limited width of the runway and is rated as a Level 3 airstrip but I guess Jim wanted to see how well I would do on one of the more challenging strips :) There are many airstrips that are much more challenging in the backcountry but this was a good test and gauge of my piloting skills at this time.
This is a video of landing at Mahoney Creek airstrip on the Middlefork of the Salmon. This is one of the more difficult runways due to the limited width of the runway and is rated as a Level 3 airstrip but I guess Jim wanted to see how well I would do on one of the more challenging strips :) There are many airstrips that are much more challenging in the backcountry but this was a good test and gauge of my piloting skills at this time.
The opportunity to
experience flying in this canyon is amazing and words can’t describe how
special these flights have been to me. I
started spending time on the Middlefork helping with river running operations when
I was just a kid at the age of 16. The
Middlefork holds a very special place in my heart. Enjoy! ~Tad Jones
Friday, July 13, 2018
Landing at Cabin Creek Airstrip in the Idaho Backcountry
Jim Hudson & Tad Jones landing
at Cabin Creek, Idaho in a 1965 modified Cessna 182.
Thursday, May 17, 2018
91X-Ray Backcountry STOL Project | Test Flights
I recently had the opportunity to help with test flights and engine break-in on the 91X-Ray Backcountry STOL Project. Our mission was to fly a designated route at very specific engine power settings for designated times. It was very important that we were always within gliding distance of an airport since the engine had nearly zero time on it and we were basically test pilots making sure the A&P's and engine manufacturers were holding up their end of the bargain. We used basic pilotage and dead reckoning for most of our flights but we also used some new technology including Foreflight's "Glide Advisor" to make sure we were always within gliding distance of an airport.
Foreflight Glide Advisor
If you are trying to figure out your glide ratio for your individual aircraft here is a good article from Foreflight: Determining Glide Ratio for My Aircraft
The POH for the 182H shows a glide ratio of 9.1:1 but I bumped that down a bit just to make sure we were able to make it to surrounding airports based on our best angle of glide speed using the Glide Advisor area ring. The ring takes into account wind speed and surrounding terrain. Our airspeed indicator in 91X is in mph so using 80mph as our best angle of glide gave us a 69kias glide which provides us a conservative 8.5:1 ratio.
Here are some screen shots from our flights showing the differences of glide areas based on our altitudes. They always say "Altitude is a Pilot's Best Friend". This gives you some proof. Look at the available glide area when we are down low near traffic pattern altitude vs. when we are up at higher altitudes. When between Ontario and Payette at 8,500' we were almost within gliding distance of 4 different airports and near the 10mile radius ring due to the winds. When nearing traffic pattern altitude near Nampa our gliding distance is only about 2miles.
 |
| Jim Hudson and Tad Jones test flying the 91X Backcountry plane with a new engine |
 | ||
Nearly 10mile Gliding Distance from 8,465 feet. This gives us easily 2 airports to glide too. We ended up climbing to about 10,000ft and had 4 airports to choose from at that altitude.
|

Friday, February 2, 2018
91X-Ray Backcountry STOL Aircraft
91X-Ray Backcountry STOL Project Update | T-Craft Aero Club Nampa, Idaho.
Written by Tad Jones
N1891X is a 1965 Cessna 182H. I really like the classic look and details of this airplane. The small details like the emblem on the yoke, the cowl flap handle, and the "shark gill" vents in the lower cowling that give this plane its Classic character.
 |
| Classic Skylane 182 Emblem |
Aero Services in Nampa, Idaho is doing the work on the Backcountry Upgrades and are doing a great job! Jim Eyre is the Director of Maintenance at T-Craft Aero Club and keeps all our aircraft safe and in great working order. Jim has been coordinating the 91X-Ray project with Aero Services. A project like this takes a lot of time and we all appreciate the time and attention that Jim puts into our airplanes.
Idaho has an amazing backcountry airstrip system and the Cessna 182 platform is a very capable backcountry aircraft for accessing many of these airstrips. The stock Cessna 182 doesn't have as much prop clearance as its predecessor and tailwheel brethren the Cessna 180 but it does have more docile ground handling characteristics and can perform take-off and landings more easily in crosswinds and challenging wind conditions due to the location of the center of gravity being ahead of the main gear instead of behind the main gear.
If you ask most pilots which airplane looks more "Cool" they will most likely say the 180 or the 185 and I would definitely have to agree. The 182 has some distinct advantages over the 180 though. Insurance costs are more affordable. There are a lot of 182's out there so it is easier to source parts. The cabin width was increased in the 182 "E" models by nearly 4" and the subsequent models are what are often referred to as the "wide body" series. 4" may not sound like much but it really gives the pilot and passengers a lot more shoulder room than the 180's, 185's and the early model "A-D" model 182's. Cessna also introduced the "Omivision" rear window with the "E" model. This allowed more light into the cabin and the ability to see behind you while flying. This is a nice feature to be able to look at the rudder during run-up to make sure the controls are moving the rudder in the correct direction too :)
There are a ton of modifications available for the Cessna 182 to make them great performing backcountry airplanes. One of the most extreme is the Peterson King Katmai STOL kit.
Since this aircraft is being operated in a Club environment many of the recommendations for modifications have been made with the consideration that this aircraft will be flown by many different pilots with different skill levels.
- Adding larger tires for more prop clearance and for rolling over gopher holes and rough terrain at backcountry airstrips.
- Adding a new nose fork to accommodate a larger front tire.
- Wing STOL kit.
- Repairing & Rebuilding the Front Seats.
- Adding dual BAS Shoulder Harnesses.
- Replacing the Windscreen. The old windscreen had crazing in the plastic in the Pilot's line of sight. The new Windscreen would be a light grey.
- Removing the stock rear seat and replacing it with F. Atlee Dodge removable folding jump seats to easily make room for camping gear.
- Simplifying the radios and avionics & standardizing the instrument panel.
- Adding an engine monitor.
- P-Ponk "Super Eagle" Engine Conversion
P.Ponk Aviation
Work has finally begun on the 91X-Ray Backcountry Project and it is looking great so far! Here are a few photos of the project:
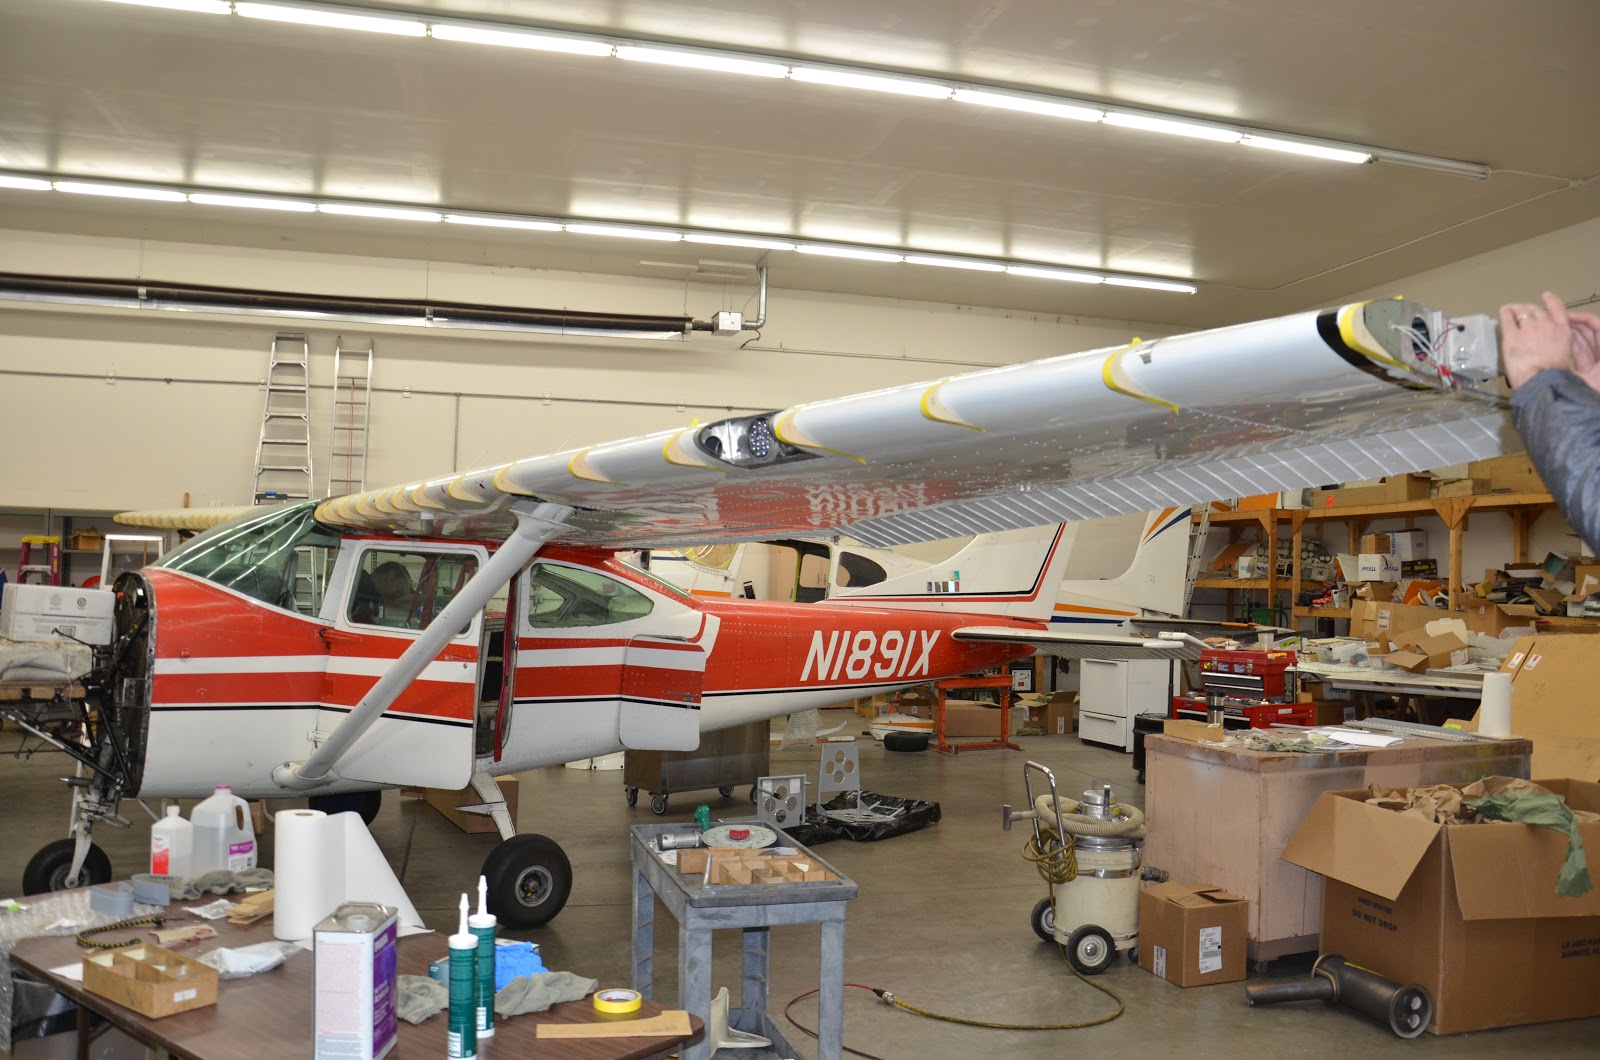 |
| 91X-Ray at Aero Services |
 |
| Top and Bottom Cowling (Note the Shark Gill Vents in the Lower Cowling) Wingtips will be replaced with wingtips provided with the STOL kit. |
 |
| Front Seats Removed |
 |
| Rear Seats Removed |
 |
| Don't worry...this isn't the new Engine :)...These are weights on the engine mount to keep the Tail off the Ground. |
 |
| Wing to Fuselage Seals Removed |
 |
| This fuel bladder is from 1978 and needed to be Replaced |
 |
| Old Fuel Bladder |
 |
| New Fuel Bladder! |
 |
| The Area inside the Wing where the Fuel Bladder is installed is cleaned and any rough areas are taped to prevent damaging the new fuel bladder. |
 |
| New Gaskets for the Fuel Bladder |
 |
| The insides of these wings are in really good shape! |
 |
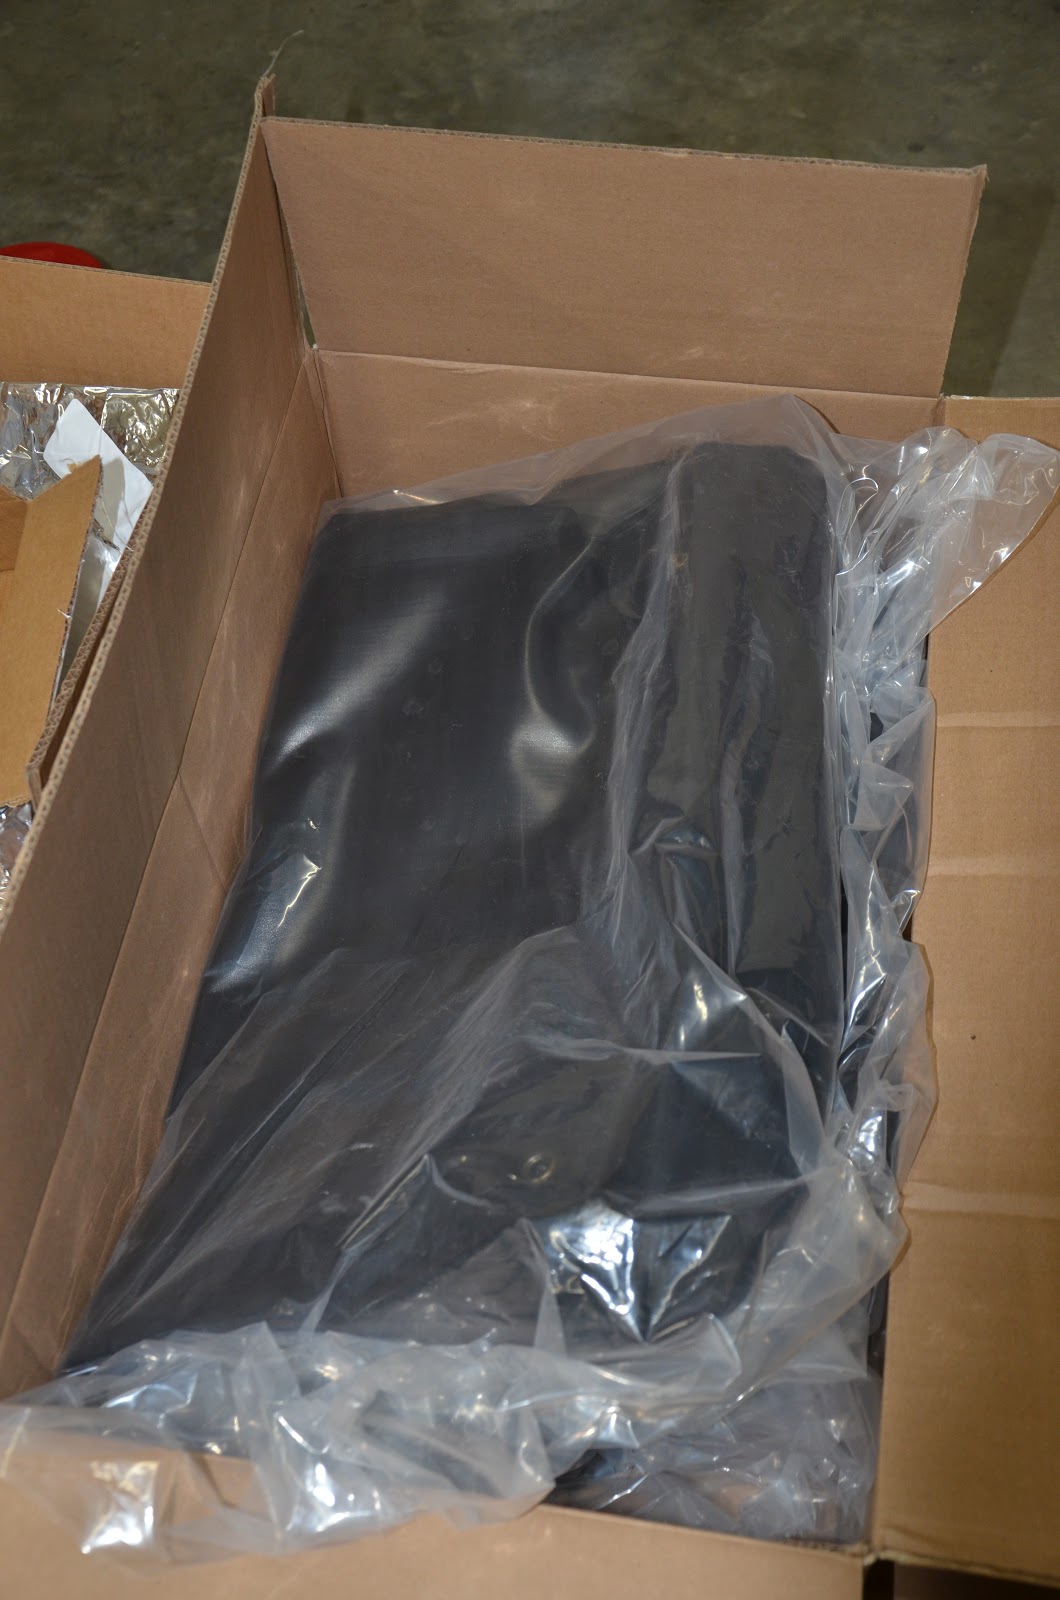
| This is the AirGlas Nose Fork for the Larger Tires - It hasn't been unwrapped yet. |
Todd Hitchcock at Hitchcock Aviation was instrumental in helping us determine which nose fork to use for this project. Hitchcock Aviation
 |
| New Tires and Wheels |
 |
| New Windscreen hasn't been unwrapped yet |
 |
| F. Atlee Dodge Folding & Removable Seats |
Our Club is lucky in that may of our pilots have experience flying aircraft with different STOL kits. The Sportsman STOL was recommended time and time again so that is what was decided upon.
Here is a great article on the history of the Sportsman STOL Kit

 |
| Drawings for the Sportsman STOL |
 |
| New Aluminum Leading Edge Cuff |
 |
| Landing and Taxi Lights |
 |
| Braces for the Leading Edge Cuff |
 |
| Cleco's on the new Aileron Gap Seals Provided with the Sportsman STOL |
 |
| More Clecos |
 |
| Beautiful Factory Continental O-470 |
 |
| Factory Continental O-470 | That Continental Gold is really Pretty |
 |
| Continental Valve Covers |
Friday, January 26, 2018
IFR Training | Electronic Flight Bags – Training Courses – and Flight Simulators
My friend “Chopper
Dave” and I have been doing some IFR flight training together and have been
trading-off being safety pilots for each other.
The other day Dave was asking me what I like to use for my electronic
flight bag, recommendations for an IFR study course, and what I use for my
flight simulator.
This is a description
of what works well for me. There are a
ton of options out there and other pilots may have other suggestions for what
works best for them.
I like to use the iPad
mini 4 in the cockpit. I used to use a
full-sized iPad but it just seemed too large for the smaller airplanes that I
fly. The current iPad mini only comes in
the 128mb version now and that is the one I have and I really like it. It
also looks like they may have come down in price a bit since I purchased mine.
If you get one for aviation I would suggest purchasing the one with cellular
service. Even if you don't take advantage of the cellular service feature,
the cellular version includes an internal GPS receiver and I have found the
internal GPS actually works pretty well...even when I forget to turn on my
Stratux :) The Wi-Fi only version doesn't
have built-in GPS. My wireless carrier only charges an extra $10 per
month to extend cellular service to the iPad & that way I can open and
close flight plans during flight, receive weather updates, etc...as long as I
am in cell range. One thing worth
mentioning is that when flying into the Idaho backcountry the majority of the
backcountry doesn’t have cell service so don’t expect to be able to close your
flight plan using your iPad after you land at a backcountry airstrip. I currently have the iPad paired with a
Stratux that I built from a kit which works great for receiving ADS-B and
displaying surrounding traffic on my iPad.
Here is a link showing the different options
and sizes of the Apple iPads:
Here is a link to the
iPad mini 4:
I also purchased the
apple iPad cover which was about $40 and so far it has been totally worth
it. One drawback to the stock cover is that it is not the toughest cover
out there. I like the simple design of
it, but if you are looking for something that might take a bit more abuse then
there are a lot of other options out there for iPad covers made by other manufacturers. I usually take the cover off when flying but
leave it on all other times to protect the glass. The stock cover is also
compatible with my knee pad iPad Holder if I want to leave it on while
flying. The stock cover also works as a table stand when I am reading
study material on the iPad.
There are a lot of
options for electronic flight bag software and I like using ForeFlight on the
iPad. ForeFlight seems very intuitive to me and I like the fact that it
works on both my iPhone and iPad and I also like using the desktop version for
flight planning and checking weather, etc.
The desktop and devise versions are all linked to your account so when
you update information on one device it will update your other devices. With ForeFlight you can download all of the
FAA published material including VFR Sectionals, IFR Low Charts, Approach and
Departure Charts, etc. One feature I
really like is that the charts are both seamless and interactive. That is, if you are flying from one area a
sectional might cover to another sectional there is no switching of maps required. ForefFlight shows it all as one seamless
chart and it shows the location of your airplane on the charts. Included in the “Documents” tab you can also
download FAA published books for free such as the FAA Airplane Flying Handbook,
Instrument Flying Handbook, Instrument Procedures Handbook, Aviation
Instructors Handbook, and of course the Airman’s Information Manual
(AIM). Just having that feature saves a
ton of money in not having to purchase books.
Another advantage is that the information is always up to date which is
a really nice feature.
Here is a link to
ForeFlight:
You can customize your
Foreflight subscription to suit your own needs too. Foreflight has a
little hidden link at the bottom of the pricing page allowing you to "build
your own plan" instead of choosing the pre-packaged plans. Just click
on the "Build your own Plan" option at the bottom of the page. I used to have a customized plan but recently
I upgrade to the "Pro Plus" plan for the interactive IFR Charts &
additional features. That way I can see where our flight is located on
the actual IFR chart & where my airplane is located on the Airport Diagram
for taxi and ground operations. ForeFlight will provide an audible and
visual warning when approaching a runway which I think is a great situational
safety feature along with the interactive airport diagram. I can see this as being super useful at an
unfamiliar airport.
There is other
software out there like WingX and FlyQ but I haven't used those and they might
do the same thing as Foreflight. I have been super happy with Foreflight
though and it works well for me.
For my IFR written
study material I am using the Sporty's Instrument course and it works really
well on the iPad. Sporty’s has an app
for the iPad and iPhone that allows great interactivity with all of your
purchased courses from Sporty’s and they are continually being updated with new
information and features. This course is
great both for pilots aspiring to get their instrument rating and those that
are instrument rated but would like an IFR refresher. With the Sporty’s course I can study reading
material, watch training videos and take practice tests using the iPad app
which is super convenient. The Sporty's course has been great for me but
there are also other options out there.
Some other great options are King Schools, Gleim, Rod Machado and Pilot
Workshops. I did the King Schools training program for my Private Pilot’s
license back in the early '90's and then I did the Sporty's Private Pilot
Course as a refresher and I liked the Sporty's course a lot so that is mainly
why I chose the Sporty's Instrument course and I am really enjoying it.
When I am flying I use
a MyGoFlight (MGF) Knee board mount for my iPad and it works great! The MyGoFlight products seem to be built
really well and are well designed.
If you have Amazon Prime
you can get free shipping with the following link:
The Knee Board Mount is
also compatible with suction cup mounts such as the MGF Flex Suction PRO.
I have a similar
single suction mount and it really doesn't seem to work that well though. It seems like I have to use the pump quite
often to keep it attached. When the red
line becomes visible you know it is time to add a few more pumps to the device
to keep it attached.
If I were to
experiment with other suction cup mounts I might go with the MGF Flex Double
Suction but I’m not sure if I would spend the money because the MGF knee board
actually seems to be working great! Here
is a link to the MGF Flex Double Suction Mount.
If someone else has used this product please let me know how well it has
worked for you.
One of my friends that
I fly with uses a yoke mount for his iPad & MGF makes one that I have
thought about getting but I don't really like the idea of my iPad moving around
with the yoke while I am flying.
For flight simulator
software I have been using X-Plane which I really like because it has a Garmin
430 and it links to my iPad and ForeFlight so it looks very similar to the
cockpit and instrument panel in the planes that I fly in reality. A
really cool feature of X-Plane is that it links to ForeFlight you can see
exactly what the flight would look like on your iPad and save flight tracks
just like a real flight when your flight is completed. The biggest challenge with X-Plane that I have
found is modifying the rendering settings to make it work with your monitor
setup. I have three monitors so I put
the 430 on my right-hand screen and I have my rendering settings set up so that
the cockpit looks similar to being in many of the same airplanes that I fly in
real-life. It doesn't have the Garmin G5's which is one difference to the
planes I have been flying but maybe X-Plane will add those features in newer
versions as the G5’s become more popular and are included in more panel
installations.
Along with X-Plane I
use a Saitek Pro Flight Yoke with a Throttle, Prop, & Mixture Quadrant
which makes it a much more realistic feeling of interaction.
I use CH Pro Pedals
that I found for a good deal on e-bay & those hook directly to the Saitek
yoke system. If you are looking at the
CH Pro Pedals make sure you get the ones with the USB compatible connector. I think there were some older versions of
these rudder pedals that had a different plug connector that may not be
compatible with the Saitek or other yoke systems.
Flying the flight simulator
doesn’t count towards any actual flight time or instrument time but that
doesn't really matter to me. I would much rather be outside flying real
airplanes but the simulator is a great way to keep your skills sharp when the
weather is too bad to fly or when I use up my monthly flying budget before the
end of the month. I have been using the
simulator to help practice approaches and familiarize myself with approaches to
an airport I am planning to fly into.
That way I have a better understanding of the airport’s procedures
before I get there in real-life. The
simulator has also been really helpful with my Instrument training for
practicing holds & pattern A and pattern B exercises.
Hopefully this helps
answer some questions on devices, aviation software, training and simulator
options. Remember that these are just
tools to aid in situational awareness and flight training. They aren’t a replacement for actual flying
skills and proficiency. The only way to
really master good flying skills is to get out there and FLY! Have Fun & Be Safe!
Happy Flying!
~ Tad Jones
Wednesday, January 10, 2018
Flight to Vale, Oregon
Near the Eastern Border of Oregon is a small rural town with a lot of character. Vale, Oregon has a population of about 1,800 and a few of those folks must be really good Artists! Many of the buildings in downtown Vale have beautifully painted murals on the sides of the historic buildings celebrating the grit and determination of the Pioneers that braved the Oregon Trail when settling the West.
Vale is only 39 miles as the crow flies from where our airplanes are based in Nampa, Idaho.
I was surprised to find that Vale also has a really nice runway facility. The main runway in Vale is a nice paved runway. The “U.S. Chart Supplement”…Formerly the “Airport /Facility Directory” (A/FD) shows the runway as 3,872’ long by 65’ wide. The name of the facility is Miller Memorial Airpark.
I decided to fly over and check it out since I had never flown into Vale before. I grabbed a bag with my running shoes and some running clothes and headed out for an adventure. From looking at some maps it looked like the downtown area was easily within running distance and I was feeling like I needed some exercise anyway.
The main runway at Vale is 36/18. There is also a dirt runway that crosses 36/18 but I walked that runway and it was pretty soft and muddy this time of year in January.
As I got closer to the other airplanes I noticed that maybe they hadn't been flown in a while...maybe in a LONG while. Not only that, but they were parked in mud. The gravel surface actually looked pretty good even though it was wet, but it was very deceiving. The gravel was like the hard coating on a good Creme Brulee. It was hard on top but there was a soft gooey mud under the gravel. As I slowed down I could feel my tires slowly sinking into the mud.

After getting the plane safely to the concrete island I explored the airport a bit. It looked like someone else had the same fate and then had devised a system of staying above the muddy mess below the gravel surface using expanded metal catwalk material to support the tires of their airplane.


After exploring the airport it was time to put on my running shoes and head into town. On the way I saw some funny goats and sheep and horses. Being in rural areas like this always reminds me of being a kid.
I ran across this little creek called "Bully Creek" that empties into the Malheur River.
Vale has some beautiful Architecture as well as the artistic murals that adorn the towns buildings. I particularly liked that there are so many different styles of architecture styles for a small town. From the indigenous stone building vernacular homes and historic buildings to international style civic buildings such as the Malheur county courthouse. I even spotted a really cool mid-century modern home on my run into town.


Vale is only 39 miles as the crow flies from where our airplanes are based in Nampa, Idaho.
 |
| Vale, Oregon is only 39 miles from Nampa, Idaho. Not even far enough away to count as an "Official" +50mile Cross Country Flight |
I was surprised to find that Vale also has a really nice runway facility. The main runway in Vale is a nice paved runway. The “U.S. Chart Supplement”…Formerly the “Airport /Facility Directory” (A/FD) shows the runway as 3,872’ long by 65’ wide. The name of the facility is Miller Memorial Airpark.
 |
| Miller Memorial Airpark - Vale, Oregon |
I decided to fly over and check it out since I had never flown into Vale before. I grabbed a bag with my running shoes and some running clothes and headed out for an adventure. From looking at some maps it looked like the downtown area was easily within running distance and I was feeling like I needed some exercise anyway.
On the way over I would be passing over many other familiar
airports in the area so there are lots of places to land in-case of an
emergency. The route took me directly
over Greenleaf Air Ranch which looks like a really nice runway but isn’t shown on
the current sectional charts. Greenleaf Air Ranch
 |
| Aerial View of Greenleaf Air Ranch 1/10/2018 |
 |
| Aerial View of the Runway Environment - Notice the Malheur River just to the East of the Runway. |
Once arriving in the Airspace around Vale I noticed a lot of birds in the area so I had a real watchful eye out for avoiding any close encounters with our feathery friends. It also looks like there could be deer or other animals grazing in the area surrounding the airstrip so I decided to do a couple low passes to make sure no animals were going to dart out in front of me on landing.
Once on the ground I decided to taxi over and park next to some other airplanes on the ramp and that turned out to be a really bad idea.
 |
| Airplanes parked at Vale, Oregon |

It took me about a half an hour of pushing on the wing struts and rocking the plane back and forth to get the airplane back onto somewhat solid ground. After that I was able to taxi over to this small island of concrete that was safe from the Creme Brulee Mud of Despair.
 |
| An Island of Dry Ground! |
After getting the plane safely to the concrete island I explored the airport a bit. It looked like someone else had the same fate and then had devised a system of staying above the muddy mess below the gravel surface using expanded metal catwalk material to support the tires of their airplane.


The other airplanes were not so fortunate.
 |
| I have no idea what this airplane is. It looks like a hombuilt. It has Flaperons like a Kitfox which is pretty cool but it has very odd proportions. It does say it has a Lycoming Engine. If anyone knows what this plane is, please add to the comments below. I looked it up on the FAA registry and it is listed as a Vulch-Air which I thought was a pretty clever name! |
 |
| This is a 1946 Luscomb. Seeing these abandoned airplanes always makes me wonder what the back story is behind them. It also makes me wonder if they will ever fly again. |
After exploring the airport it was time to put on my running shoes and head into town. On the way I saw some funny goats and sheep and horses. Being in rural areas like this always reminds me of being a kid.
 |
| These Black & White Goats on Logs are so Funny! |
 |
| This horse looks just like my horse named "Banner" that I had when I was growing up. |
 |
| Bully Creek - A Tributary of the Malheur River |
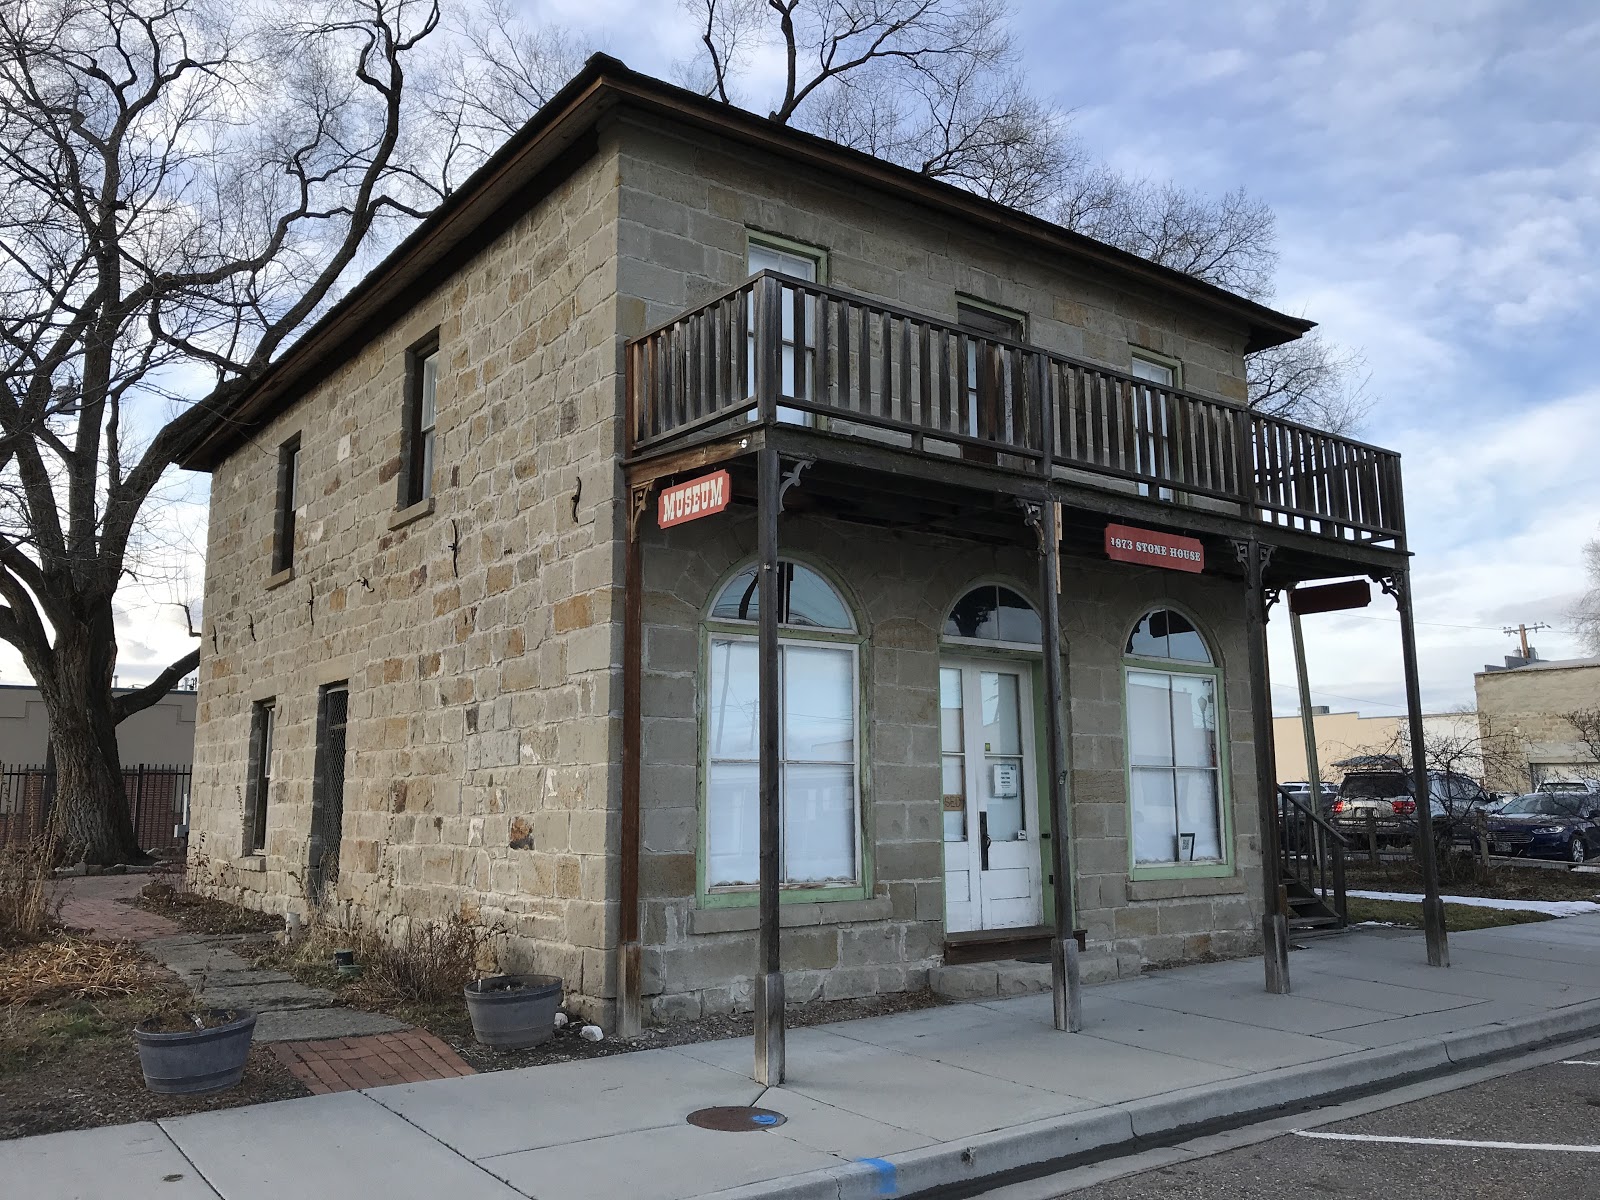
Vale has some beautiful Architecture as well as the artistic murals that adorn the towns buildings. I particularly liked that there are so many different styles of architecture styles for a small town. From the indigenous stone building vernacular homes and historic buildings to international style civic buildings such as the Malheur county courthouse. I even spotted a really cool mid-century modern home on my run into town.
 |
| Rinehart's Stone House and Stagecoach Inn |

 |
| Malheur County Courthouse - International Style |
 |
| Stone House built with Indigenous Stone collected from the surrounding area. |

 |
| This building in downtown Vale, Oregon reminds me of buildings in Chicago that were designed by Burnham & Root in the late 1800's and those of the "Chicago School of Architecture". Although not as extravagant it does remind me of the Auditorium Building in Chicago designed by Louis Sullivan and Dankmar Adler. Auditorium Building - Chicago, Illinois I wonder who designed this building? |
 |
| This building reminds me of a very simple example of Romanesque Revival style. One thing that I noticed was that the lower arch above the door doesn't match the radius of the other two arches over the windows creating an interesting non-symmetry to the buildings facade. The stone detailing on this building is amazing! |
 |
| Ornament Carved in Stone on a Historic Building in Vale, Oregon |
 |
| A Very Cool Mid-Century Residence in Vale, Oregon |
...and here are some photographs of some of the beautiful murals in town. You really need to see them in real-life to appreciate the detail of many of these paintings.


 |
| The Escort Artists: Don Prechtel and R.E. Pierce "As settlers move West, the United States built Army outposts to provide protection. When mining flourished, the federal government provided military escorts for precious ore shipments and payrolls. The Army built military roads through the area, often following existing trails established by wildlife, Native Americans and early emigrants. Many of our modern roads evolved from these military roads. |
 |
| "Our camp this night was on the Malheur Creek, a stream about two rods wide at the crossing. Here we found a rock bottom with springs of hot water boiling up in the bottom of the ford. At this place there is a large butte of red lava that looks like it had not got cool yet, and one would hardly suppose that it had, from the number of hot springs along its base. The grass is here good, but the water rather warm. |
 |
| "Still exciting after all these years!!" |
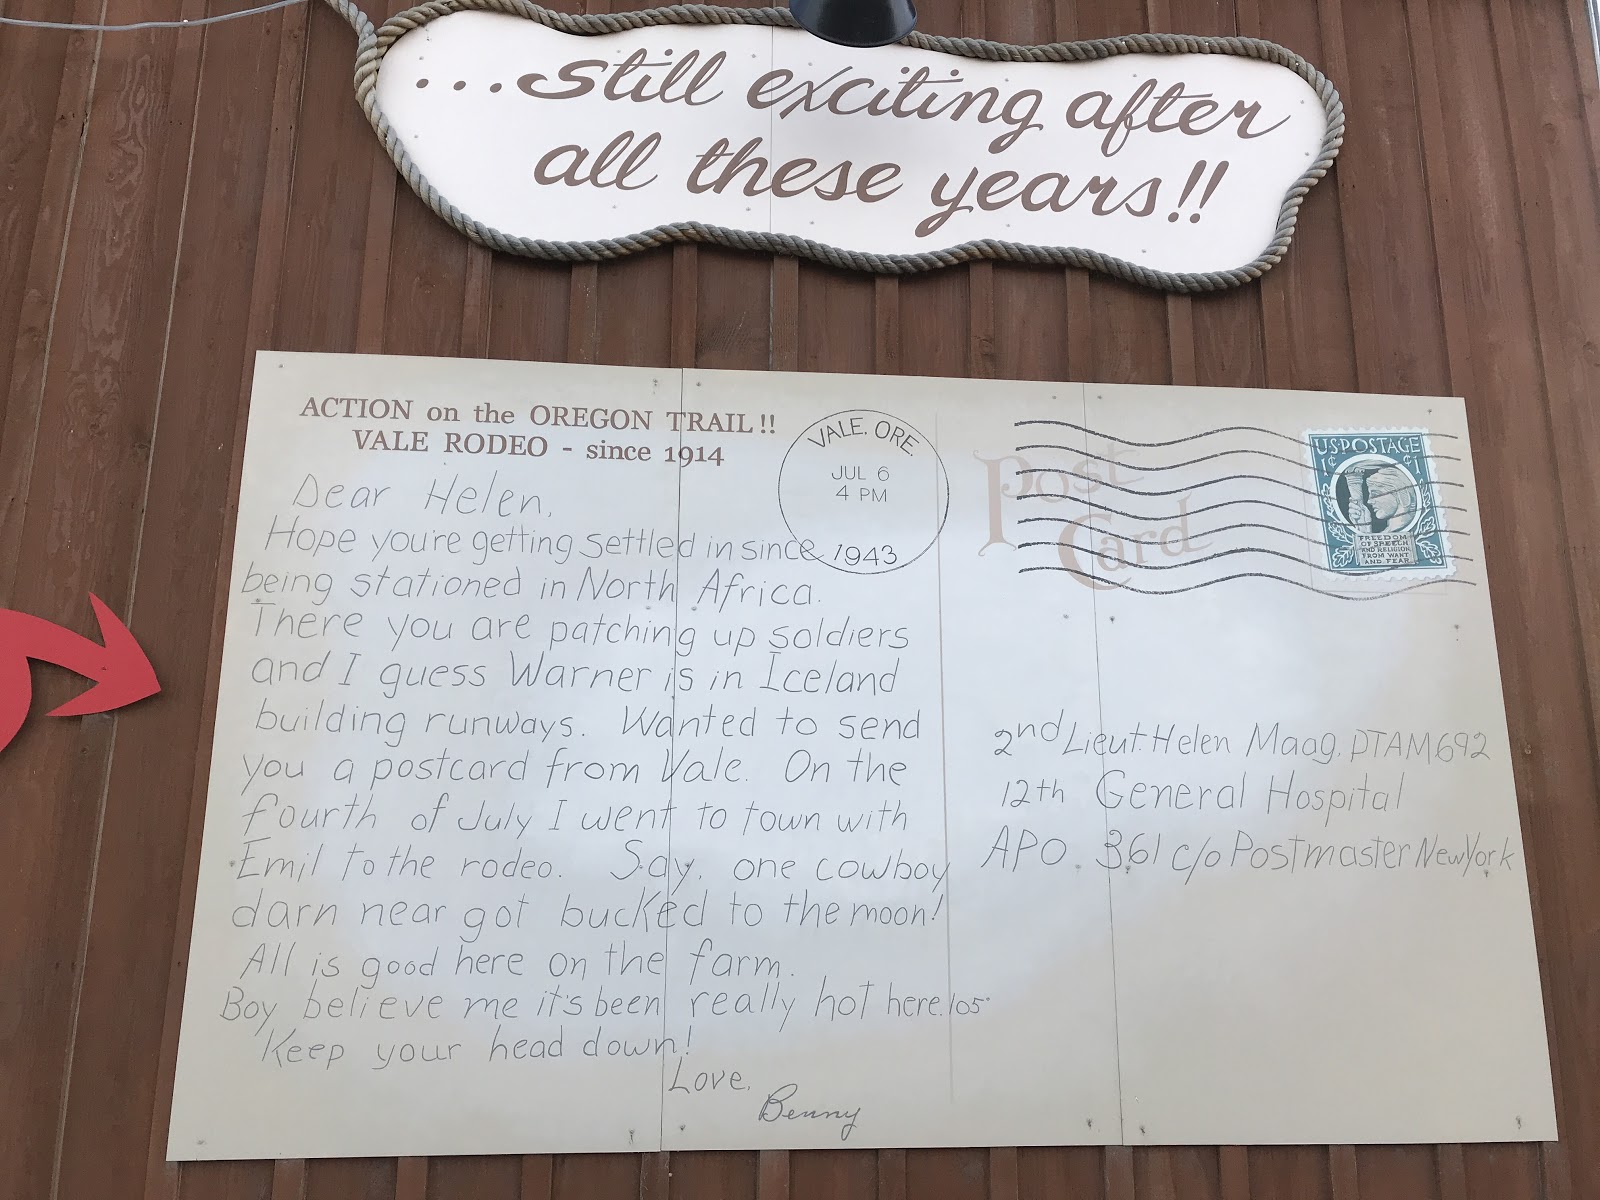 |
| "Dear Helen, Hope you're getting settled in since being stations in North Africa. There you are patching up soldiers and I guess Warner is in Iceland building runways. Wanted to send you a postcard from Vale. On the fourth of July I went to town with Emil to the rodeo. Say, one cowboy darn ner got bucked to the moon! All is good here on the farm. Boy, believe me it's been really hot here. 105°. Keep your head down! Love, Benny |

After visiting downtown I headed back to the airport. The airplane was still safely on the concrete pad so I started up the engine and headed back to Nampa. After a few touch and goes and making sure the traffic pattern was clear of other aircraft both visually and verbally on the CTAF I did a practice spiral 360 to landing with minimum power to simulate an emergency. I think it is always good to practice these types of maneuvers in a controlled environment so you are prepared if it happens in an emergency situation. It is also good practice so that you have an idea of how far you can glide and not over-glide or out-glide your landing area. It is a bit of a balancing act to manage the energy of the airplane so that you have just the right amount of energy to put the airplane down where you want to. I also thought it would be kinda fun to do a 360 degree spiral to landing since the runway heading is at 360 :)....A 360 to Runway 360!
It was really relaxing to pull the power back and do a shallow gliding spiral down to the runway. Here is a video of the spiral approach and landing. The sun was getting low on the horizon and casting this beautiful light on the surrounding area too.
Along the way home the sun began to set and it was another spectacular sunset from the air.

I don't think I will ever get tired of seeing sunsets reflecting on the wings of an airplane!
~Tad Jones
Subscribe to:
Posts (Atom)